28 January 2017

Butterfly Photography 101 - Part 4

Butterfly Photography 101 
Part 4 - Lighting and Using Flash in Butterfly Photography
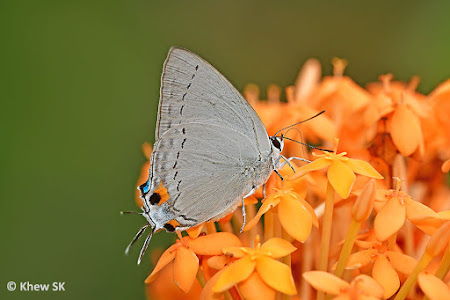


The earlier articles in this series in Part 1, Part 2 and Part 3 dealt with the variety of photographic equipment that can be used for butterfly photography, the types of magnification devices and the typical settings on a DSLR system that a butterfly photographer uses. We also discussed the interrelationship between the ISO, aperture settings and shutter speeds when taking a photo.


In this week's article, we take a look at how different lighting conditions can "change" a butterfly's appearance and how lighting can be used to enhance your shots. In the macro photography genre, which butterfly photography falls under, the use of artificial lighting is often quite critical. One of the main issues with macro and butterfly photography is the problem of light fall off. As magnification increases, light decreases. This is even more critical as a photographer needs to use a small aperture to get better depth of field for sharp shots, and has to shoot a butterfly under shade.


Macro combo on a tripod. Ideal for non-skittish subjects. For shooting butterflies, tripods tend to be more of a hindrance especially when tracking butterflies that flit from flower to flower rapidly or bashing amongst the thick undergrowth to get at a perched butterfly.

Purist macro photographers have always advocated the use of a tripod for doing close-up work. Shooting from a stable platform allows the photographer to focus accurately on the subject and use appropriate settings to get the sharpest shot and optimal exposure, without having to deal with motion blur. This is fine, if you have subjects that are not particularly skittish and only stop for a fleeting moment on a flower to feed!


Butterfly paparazzi all shooting handheld with an external flash mounted on the camera

Butterfly photographers often have to contend with alert subjects, those that flutter continously for hours on end, and constantly change positions even when they stop to feed. Trying to set up a tripod with sophisticated off-camera flash combos to shoot constantly moving butterflies is at best impractical, and at worst, an exercise in futility! Hence many butterfly photographers train themselves to handhold their shots, as they chase a butterfly and their minimal equipment allows them the flexibility to quickly adjust their positions to capture their subjects without spooking the butterfly off.

Using Flash in Butterfly Photography

We have often been asked if it is better to do butterfly photography in natural lighting without the use of a flash. Whilst it is certainly possible to photograph a butterfly with available natural lighting, conditions frequently change that make it challenging to get a well-exposed shot or capture the true colours of a butterfly's wings. This is where the use of a "portable sun" comes in handy. A good DSLR system comes with technically-advanced dedicated flash systems that make flash photography a breeze.


A butterfly shot in bright sunshine with a flash in front curtain sync. The flash illuminates the subject butterfly accurately, but ignores the background, rendering it almost totally black. Whilst the contrast between the subject and background makes it an interesting shot, it does not appear "natural" and does not accurately reflect what the actual environment looked like when this shot was taken.

Let us start with the typical settings of using a flash in general photography, and the settings that are required in butterfly photography. Most normal flash photography situations employ the use of the front sync (or 1st curtain sync) where the flash fires immediately after the shutter opens. In very simple terms, the camera flash illuminates the subject and exposes it accurately. In butterfly photography, this gives results that appear like a butterfly was shot at night, particularly when the surroundings in which the butterfly was shot is in shade or dimly lit. This is generally not how you would perceive a butterfly in its natural environment.


A butterfly shot in very dim lighting on the shaded forest understorey.  The 2nd curtain flash helps to even out the ambient lighting with an extra fill-flash light to create a pleasing balanced exposure of the butterfly against its background

This is where the rear sync mode (also called the 2nd curtain) comes into play. If the flash fires right before the shutter starts to close to end the exposure, this is called 2nd curtain sync (or rear sync). Essentially, when one uses the rear sync mode, the camera exposes for the whole scene before the flash fires just as the shutter closes. This allows the flash to perform as a "fill-flash" that exposes the subject just before the shutter closes. The result is a more evenly exposed shot of the butterfly with a well-lit background, appearing more natural.


A butterfly shot in bright sunshine with the flash illuminating the subject against a bright background

The following diagrams below show how to set the camera to Rear (or 2nd) curtain sync in Canon and Nikon DSLR and respective Speedlight systems. For other brands, please refer to your camera manuals on how to set these flash functions.


Setting 2nd Curtain flash sync on a Canon camera body. This controls the built-in flash


Setting the 2nd curtain flash sync on Canon Speedlight external flash


For Nikon systems, change the flash settings to Rear (2nd curtain) flash sync until the command screen shows SLOW/REAR under flash mode

Macro enthusiasts tend to use a myriad of accesories to mute the harsh effects of a direct flash - from "softboxes", putting in tissue in front of the flash, and a whole host of creative and customised flash attachments. Others use different flash brackets to take the flash off-centre and off camera to move the flash off axis with the lens. Some advocate the use of ring lights and specialised macro flashes.


A typical "softbox" flash diffuser that some macro photographers use. Large enough to scare off butterflies in the field


Twin macro flash mounted off camera with adjustable brackets. Good for creative lighting in macro work but absolutely impractical for shooting butterflies out in the field! And guaranteed to scare off butterflies with this "monster-like" contraption, long before you can get anywhere near them!

From our experience, shooting butterflies requires a lot of flexibility and ease of freedom of movement in the field. Attaching large devices to your flash will probably scare off the butterflies long before you can get close enough to shoot them. Furthermore, the effect of trying to diffuse the light from the flash is less critical on a two-dimensional subject like butterflies, as compared with beetles with shiny reflective carapaces or a fat (and very 3D) caterpillar.


A typical butterfly shooter's handholding stance with an external flash mounted directly on the camera

Hence, keep it simple. Most of us shoot with the external flash mounted directly on the hotshoe of camera. Canon users don't even put the diffuser on their flashes, preferring to shoot direct and let the ETTL technology do its work. Nikon Speedlights tend to be a bit more harsh and having the diffuser cup on the flash usually gives better results. Whilst purists would argue otherwise, the thousands of butterfly photos featured on ButterflyCircle's online sites bear testimony to the techniques used by butterfly photographers.


However, let us get back to the question of why use a flash in full bright sunshine? The effects of strong and harsh sunlit conditions in the field can be mitigated with the fill-flash effects of the rear curtain sync function. The fill-flash brings out areas of the butterfly's wings that may be in shadow, and evens out the dark/light contrast in bright sunshine.


When the subject is in shade and the background is bright, the camera's multi-pattern metering mode may average the exposure across the frame and render the subject butterfly slightly under-exposed. The rear curtain sync mode will then add in a little fill light to expose the subject and bring it out from under the shadow, giving the final result a more well-balanced exposure against a bright background.


Making use of natural backlighting to create an interesting shot.  The light filters through the translucent wings of the butterfly, creating an artistic shot 

Having explained the benefits of using the rear curtain sync flash mode in butterfly photography, there are opportunities in the field that make use of ambient lighting conditions to deliver a creative and eye-pleasing result. For example, back-lit situations can be used to create artistic compositions that accentuates the "translucency" of a butterfly's wings.


Same subject, different positions of two light sources create different moods and expressions that highlights different details and aspects of the subject

Off camera flash positions can also be utilised to create different moods and artistic expressions of the subject, if an opportunity presents itself where a subject (like this caterpillar) is in a cooperative mood and stays still enough for the manipulation of the light source around it.

Hence, in butterfly photography, whilst there are general guidelines to getting an eye-pleasing shot, there are no fixed techniques or answers to every single shooting situation. The key is to explore, experiment and execute your techniques and see which ones work best to deliver the outcomes that satisfies you most!

Text by Khew SK : Photos by Sunny Chir, Chng CK, Antonio Giudici and Khew SK

21 January 2017

Butterfly Photography 101 - Part 3

Butterfly Photography 101
Part 3 - Digital SLRs and Camera settings for Butterfly Photography


Our earlier two articles Part 1 and Part 2 of this series on Butterfly Photography outlines the spectrum of digital photography equipment and accessories that are required for good photos of butterflies. It should be emphasised that expensive equipment alone does not guarantee National Geographic-quality outputs. Even a smartphone can sometimes deliver results that much higher end cameras can, depending on the conditions that the photograph is taken under, and the most important part of the whole photography equation - the man (or woman!) behind the camera.


Putting aside the debates on the pros and cons of different types of photographic equipment, let us now assume that a butterfly enthusiast has decided to use a digital SLR as his primary equipment for butterfly photography. The modern DSLR starts from entry-level models to the high-end professional equipment. However, irrespective of the technological capabilities of each model in a camera manufacturer's line-up, let us look at the basic settings that you should consider when using a DSLR for butterfly photography in the field.

ISO Settings


Different types of Fujifilm in the good old days of yore.  For slide film, the Provia ISO100 and Velvia ISO50 were my favourites

The most fundamental setting in a DSLR is the ISO setting. In the good ol' film days, we used to go to a photographic outlet to select film to suit the conditions that we were planning to photograph in. Back then, selecting film speeds of ISO25 to ISO100 was quite typical. Basically, ISO is the sensitivity of your camera sensor to available light. The lower the ISO number, the less sensitive it is to the light, while a higher ISO number increases the sensitivity of your camera. This translates to the amount of graininess (on film) or "noise" (on a digital sensor) that you see on your photo. A higher ISO means more noise, whilst a lower ISO delivers less noise on your photo.


A graphical representation of ISO and the amount of "noise" or "graininess" of the output.  Recent models of DSLRs can push the ISO to 102,400 and even way up to an astonishing ISO 3,208,000!

Most DSLRs will allow you to change the ISO settings manually to a setting of your choice. Generally, under bright sunlit situations, select a lower ISO and in dark shady conditions, choose a higher ISO. The more recent DSLRs also have a function where the ISO can be automatically set by the camera depending on the lighting condition. I usually avoid this automatic setting, as it is quite important for the photographer to adjust the ISO settings to control the output desired.


In very shaded conditions where certain species of butterflies lurk, you may have to push your camera sensor's ISO capability to its extreme.  In this shot, the ISO setting was 10,000

With recent technological advances in sensor design, many DSLRs can now handle ISO3200, ISO6400 and above, with more than acceptable results coming out of the camera. So, for a start, learn how to set the ISO on your chosen DSLR and to quickly adjust the ISO according to the shooting conditions that you encounter in the field.

Exposure Modes

Most modern DSLRs will allow a photographer to select the exposure mode of choice to suit the preferred type of photography requirements and conditions. In fast-action sports photography, for example, a photographer would usually select a Shutter Priority mode, so that he can control the shutter speeds to freeze the high-speed action on a racing track or a sports field. Basic DSLRs will feature 5 main exposure modes - Fully Automatic Mode; Program Mode; Shutter Priority Mode, Aperture Priority Mode and Manual Mode.


A typical Nikon DSLR's dial to switch to one of 5 basic exposure modes from Manual to Fully Auto. There are often other preset modes that help the photographer handle exposure modes for different scenarios

Exposure modes determine how the DLSR selects shutter speeds and aperture settings for the best exposure of your shot. For butterfly photography, I almost exclusively use the Aperture Priority mode. This is primarily because I will have control over the aperture (and hence the depth of field) of the shot, to keep as much of the subject butterfly in sharp focus, as well as "design" the background in which the subject butterfly is shot.


Controlling the aperture means the ability to manage the background of the shot. From left to right, the butterfly shot taken at apertures of f/5.6, f/9 and f/11. Note how the backgrounds blur off smoothly when you shoot with a larger aperture.

However, using a preferred aperture to achieve a sharp subject and a nice creamy background may mean that the shutter speed falls below handholding speed. In such instances, increasing the ISO or finding a stable platform from which to shoot your subject may be required.


The understanding of the relationship between ISO, aperture and shutter speed forms the most fundamental building block of photographing butterflies. Setting the appropriate ISO allows the photographer to control the aperture (depth of field) to determine the end result that he desires. In Aperture Priority mode, setting the aperture of preference means that the camera controls the shutter speed to get the best exposure of the shot. This will sometimes cause motion blur (caused by camera shake) that will spoil a perfectly exposed shot, rendering it out of focus!

Exposure Metering

Coupled with the Exposure Mode that you have selected, most DSLRs then allow a photographer to determine what the camera "sees" to deliver the optimal exposure for the shot. There are typically 3 metering modes :


Typical Canon camera exposure metering modes © digitalcameraworld

Automatic Multi-Pattern Metering : Also called Matrix metering in Nikon and Evaluative metering in Canon DSLRs, this mode measures the light coming off the entire scene onto the sensor and averages the lighting condition to deliver a best exposure output. Most of the time, this works well for butterfly photography, except in instances where the background and subject lighting are significantly different. More about this in future articles)

Centre-Weighted Metering - This exposure metering shifts the camera's "eye" towards the centre of the image and largely ignoring the light input from the outer edges of the scene. In Canon DSLRs there is a further mode known as the Partial metering, but still falls under the class of the Centre-biased metering exposure mode.

Spot Metering - The DSLR "sees" only a small single spot at the centre of the frame, metering its exposure on this area of usually 2-4% of the sensor. This mode is typically used for images where the subject and background are of high contrast and a photographer wants to get the correct exposure for the subject, rather than the background.


A shot taken with multi-pattern metering (matrix metering on the Nikon D500).  Despite different brightness levels on the subject, background and foreground, the camera's metering capability manages to even out the bright and dark areas, giving a pleasing and natural-looking result

For my butterfly photography needs, I normally leave the exposure metering to the multi-pattern metering mode (Matrix metering in Nikon, Evaluative metering in Canon) and allow the camera's technology to do its work. This works for me at least 95% of the time, and only in exceptional cases where the field situation is so challenging that I need to switch to the other exposure metering modes.

Focusing Modes

Contemporary DSLR models feature a number of different focusing modes that allows a photographer to choose the most appropriate one for his photographic requirements. There are typically 3 focusing modes on most DSLRs :


Different type of focusing modes on a Nikon DSLR.  The selection of Manual Focus, Single Auto Focus or Continuous Auto Focus modes vary from camera model to camera model

Manual Focus - where you use your own judgement to determine whether or not your subject is in focus. You manually focus the camera, overriding any automatic focusing functions of the camera.
Single Auto Focus - where the camera uses its autofocus technology to snap onto the subject and focus once and then lock it.
Continuous Auto Focus - where the camera uses its autofocus capability to continuously track and focus on the subject (which may be moving) and then takes a photo when the shutter is pressed fully.


Nikon system AF modes - clockwise from the top left: Single-point AF mode, Dynamic-area AF mode (9 points), Dynamic-area AF mode (21 points), Dynamic-area AF mode (51 points), 3D-tracking mode, Auto-area AF mode and Group-area AF mode.

I find that for butterfly photography, I usually stay on the Single Focus mode, using the AF technology that I paid for in the camera body, and depending mostly on the autofocus capability of the camera to do its work. There are many advocates of manual focusing amongst macro photography enthusiasts, and it is a question of preference which mode of focusing a photographer chooses to use.


A shot of a Green Commodore with a single AF point locked onto its eyes.

Having discussed the focusing modes, and assuming that you have chosen to exploit the camera's autofocusing technology, there are then several AF settings that can be found in many recent DSLRs. These are :


Single AF point (in red) showing where the camera has locked its focus on. Canon DSLR system

Single Point AF - where the camera will focus on where the AF point is placed. Many DSLRs allow you to shift the AF point from centre to a series of off-centre locations ranging from 9 points to over a 150 points on the sensor!


Multi AF points (in red) showing where the camera is focusing on. Canon DSLR system

Multi-Point AF - or sometimes called dynamic-area AF, allows the user to focus on one spot but the camera automatically changes the focus if the subject moves or shifts.
There are other modes of AF depending on the brand and model of the DSLR you choose - from Group Dynamic AF, Closest Subject AF, Predictive AF and so on, which I will not deal with in this article.


Single AF focus point at (or near to) the subject's eye

In butterfly photography, I just stick to the plain vanilla Single Point AF coupled with the Single Focus AF mode. This gives the best control over where you want to focus on (usually the eye of the subject butterfly) and then shift the focusing point accordingly if needed. The camera does not override your focusing preference, so that you don't end up with an out-of-focus shot most of the time.

White Balance

The final in-camera setting that we will discuss here, is the White Balance. The White Balance setting in a camera basically tells the camera how to make the distinction of "seeing" whites under different lighting conditions. The human eye can adjust itself to see a white object in bright sunlight, overcast conditions, in a room lit by fluorescent lighting or incandescent lighting or in deep shadow. A camera is unable to make that decision.


Same butterfly, different "whites" depends on the white balance settings and its environment

Most cameras feature a range of white balance settings - Sunlight, Flash, Cloudy, Shadow, Fluorescent, Incandescent, and Automatic.


White butterflies and flowers require a 2nd look to ensure that the whites stay natural. Different DSLRs' white balance technology vary - some are more accurate than others. At times, the colour cast due to reflections from its surroundings affect the subject's "whiteness"

I normally leave my DSLRs White Balance setting on "Auto" and then shoot in the camera's RAW mode. This allows me to make adjustments to the White Balance during post-processing and tweak the shot to the most natural colour as far as possible.


Another white butterfly, the Psyche, tests the DSLR's white balance capability

Part 3 of this series of articles covers the basic settings in a DSLR for butterfly photography and we hope it will be useful to our readers who are just venturing out to photograph butterflies in the field.

Text by Khew SK : Photos by Sunny Chir and Khew SK and credits to various websites and individuals.


14 January 2017

Book Review : Butterflies of India

Book Review - BNHS Field Guides
Butterflies of India by Isaac Kehimkar


Description : In his third book on Indian butterflies, Bombay Natural History Society Deputy Director Isaac Kehimkar describes 1,025 species and subspecies butterflies that occur in the Indian subcontinent. His two earlier books, Common Butterflies of India and The Book of Indian Butterflies (2008) had been well received, and this third book takes it to another level, covering a much larger number of species than previously featured.


Two earlier books by Isaac Kehimkar

Descriptions of the butterflies are illustrated with colour images of specimens by Isaac and over 50 contributors from Pakistan, Bhutan, Bangladesh, Sri Lanka and Thailand who shared their photos to cover the wide range of species featured in the book. The book also includes life histories of different butterfly families and their adaptation techniques. Besides highlighting the rich biodiversity of India's butterfly fauna across a wide biogeographic expanse in the subcontinent, this book is a highly enjoyable guide for nature lovers. Isaac Kehimkar discusses the biology and behaviour of butterflies, as well as butterfly watching, photography, rearing and gardening to attract them. Written by a popular expert in the field, the latest Butterflies of India is another great effort by Isaac and will no doubt be another best seller that will advance the appreciation and knowledge of India's butterfly fauna.


Product Details : xii + 528 pages; 5-3/4 x 8-1/5; ISBN : 9789384678012 ; hardcover ; published by Bombay Natural History Society, Mumbai, 2016.


The butterfly-man of India, Isaac Kehimkar © Paresh Churi

About the Author : Isaac Kehimkar joined the Bombay Natural History Society as a volunteer in 1978, and since then has been lending his expertise to the Library, Publications, Public Relations and Members' programmes. Currently, he is the Society's Deputy Director (Natural History). He is a Fulbright scholar and recipient of the Sanctuary Green Teacher Award in 2014, and Kirloskar Vasundhara Green Teacher Award in 2015. This is his third book on butterflies of India.

Book Review : I wrote a review of Isaac's The Book of Indian Butterflies back in Sep 2008. Back then, it was already one of the most comprehensive books about butterflies of the Indian subcontinent available. It featured over 700+ butterfly species/subspecies. Last year, in 2016, Isaac launched his latest work, Butterflies of India, which further outdid his earlier book by raising the bar even higher, featuring 1,025 species/subspecies this time. Six years have passed since his earlier book, and the exponential growth of butterfly enthusiasts and photographers made Isaac's work a lot easier this time around, as he was able to collect photos of rarely seen species. The popularity and increase of photo-sharing on social media groups like Facebook have also made it possible to access previously hard-to-access photos from individuals.


I recall that, some time back in 2010, Isaac was involved in a horrific traffic accident whilst returning from a field trip. He barely escaped with his life and suffered multiple fractures to his leg. But, as he shared in his book, Isaac took the misfortune positively and found the perfect opportunity to start on his new book. He set a target of over 1,000 species/subspecies, which he met and exceeded, with the help of many individuals that he got to know from the Internet and social media platforms.


An interesting section on the biogeography, climate and vegetation is a must-read for those keen on exploring India's butterfly fauna

In the Butterflies of India 2016, Isaac spent quite a lot of effort to cover a good spread of information about butterflies in his 40-page introduction. He covers the mandatory topics like early stages, structure of the adult, biology, behaviour, ecology, mimicry and migration in relative good depth. This is followed by a 20-page section on biogeography. This is perfectly understandable, as the Indian subcontinent is vast and the variety of habitats from sea-level mangrove habitats to the 'roof-of-the-world' Himalayan region is mind-boggling. Details on climate and vegetation across the various biogeographic areas are well-researched and covers just about the right amount of information needed to understand the butterfly habitats and ecosystems in India.


The main section of the book covers the species/subspecies from the six major families of butterflies in the preferred taxonomic order starting from the Hesperiidae and then progressing to Papilionidae, Pieridae, Riodinidae, Lycaenidae and ending with Nymphalidae. I found that the layout of this section is certainly an improvement over the previous book in that the photos are larger and of higher quality, although I would have preferred even larger depictions of each species. However, given the enormity of the task of featuring over 1,000 species, it would have been quite challenging to keep everything in a 500+ page book.


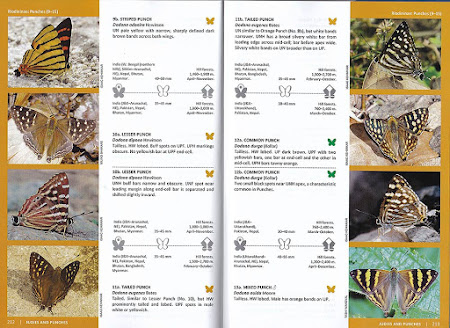
Well-organised layout of the butterfly species pages

Each page features 4 photos of butterflies, although not necessarily correspondingly of 4 different species. This is where there may be a little bit of confusion, because of the attempt to feature the sexual dimorphism of some species and upper/underside differences. This is but a small issue, as one gets to understand the intention of the author quickly as one flips through the pages. The layout throughout the book is consistent, predictable and pleasing, with coloured borders used to separate the families.


The photographers are acknowledged on each photograph and is a more convenient way of honouring the work of these contributors easily, compared to some books where the photographers are acknowledged on a separate page and the reader has to keep cross-referencing the photo with the acknowledgements to see who the author of the photo is.


As one flips through the pages, the reader should enjoy some of the photos of rarities that are seldom photographed in the field. Examples are the Bhutanitis spp., Teinopalpus and many other species that are featured with the red butterfly icon (representing 'rare').


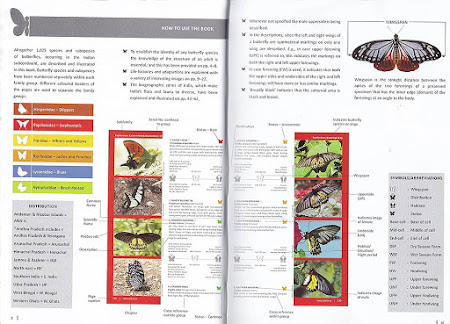
The How to Use the Book pages explains how each page is laid out and the information contained therein

One has to study the "How to use the Book" pages x-xi to fully understand how the species pages are laid out and the legend to the icons. Isaac classified the rarity status into only 3 categories : rare, uncommon and common in this book. Other relevant information icons cover the distribution, wingspan and habitats. Text is minimised as compared with his earlier book, and the concise description is probably adequate to describe the key features of each species of butterfly.


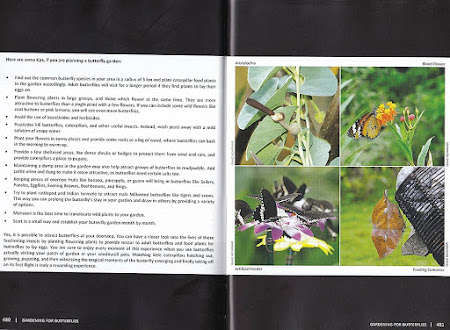
Some tips on butterfly gardening

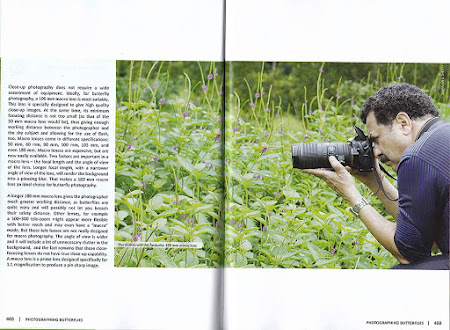
The final section of the book covers butterfly photography and watching, gardening and conservation as Isaac talks about his experience in the field, his favourite photographic equipment and how to attract butterflies to your own home garden. The glossary of terms used in the book and the main index of common names and scientific names are also useful features as one tries to locate the butterfly species.


Isaac's definition of wingspan of a butterfly

There have been many discussions about a butterfly's wing dimensions and how these dimensions should be depicted. There are differing schools of thought, and one, advocating "wingspan" often runs into definition challenges. In Isaac's definition, the wingspan is the [straight distance between the apices of the two forewings of a preserved specimen that has the inner edge "dorsum" of the forewings at an angle to the body.]


How butterflies are typically set in a scientific collection (with the dorsum of the forewing at right angles to the body)
Source : Fleming Collection @ Lee Kong Chian Natural History Museum, Singapore

This raises some questions, as the "angle" was not defined, and changing this "angle" changes the "wingspan" of the butterfly. Also, as shown in Isaac's example, I have rarely seen preserved specimens in entomological collections set in this manner. Specimens in most scientific collections that I have come across, shows the dorsum perpendicular to the thorax. Perhaps it may cause less confusion, if the forewing length is used to give an indication of the dimension of a butterfly's wing, as the measurement from the base of the wing to the apex does not change, irrespective of how the wings are set in a collection.


Isaac must have spent a lot of time in researching, writing, proof-reading and designing his book this time. But as any author will quickly acknowledge, there is often the "oopsie" moment when an error is inadvertently overlooked. I challenged myself to look for some errors which I could contribute to Isaac's next effort, perhaps? It took me quite awhile and I had almost given up, but I did find something that Isaac may want to review and consider.


The Indian Cabbage White (Pieris canidia) is not known to be distasteful to predators nor display aposematic colouration.  However, the Large Cabbage White (Pieris brassicae) is a known distasteful species in research literature.  

The "error" if I may venture to call it that, can be found on page 31 of the book under mimicry. When I was browsing the book, I was intrigued to see that the Indian Cabbage White (Pieris canidia) to be a distasteful "model". As this species can also be found in Singapore (where I have come across one instance where I saw a Yellow Vented Bulbul with a Cabbage White in its beak), I cross-referenced several websites and books to ascertain if there was any research done to prove that this species displays aposematic colouration and is indeed distasteful to predators. I could not find any. Perhaps Isaac meant to feature Pieris brassicae (Large Cabbage White) instead?


A butterfly friend and a gentleman, Isaac Kehimkar, at work

All in all, I enjoyed reading Isaac's book and it is indeed a great effort on the part of this 'butterfly-man' from Mumbai to complete such an impressive work for experts and amateurs alike. His latest book will, no doubt, be another best seller for students of Indian butterflies and for the global community of butterfly enthusiasts. I had the privilege of meeting Isaac in person, many years back when we met in Penang, Malaysia, and it would be hard to imagine anyone not easily feeling comfortable in the company of this affable, soft-spoken and courteous gentleman. So, well done, Isaac, and I look forward to your next book!

Text by Khew SK : Photos from the book by Isaac Kehimkar. Photo of Isaac by Paresh Churi