Digital Post-Processing - Part 3 : Photo Retouching using Clone Stamp Tool
In this 3rd instalment of our Digital Post-Processing series, ButterflyCircle member Loh Mei Yee will share her digital techniques to remove minor unwanted elements in a photo and how to clean up the background of a shot to bring out the subject of the shot using Photoshop tools. Over to Mei Yee....
In Part 1 and Part 2 of our Digital Post-Processing series, I shared how to enhance photos using mainly Nik plug-ins to remove noise, sharpen images, adjust brightness and contrast, and cropping photos. In the following 2 parts of this series, I will be showing how to remove unwanted elements and how to clean up the background with the use of Photoshop tools like the ‘Clone Stamp Tool’ and ‘Layer Mask’.

In Part 1 and Part 2 of our Digital Post-Processing series, I shared how to enhance photos using mainly Nik plug-ins to remove noise, sharpen images, adjust brightness and contrast, and cropping photos. In the following 2 parts of this series, I will be showing how to remove unwanted elements and how to clean up the background with the use of Photoshop tools like the ‘Clone Stamp Tool’ and ‘Layer Mask’.

Photo retouching…is it necessary? When we are out photographing butterflies, our goal is to do as much “right” in the camera as possible so that we won’t need to do too much “fixing” in post-processing later. As for me, I will always try to achieve clean or blurred background, so that the butterfly is isolated from its environment, leading the viewers’ eyes to the main subject of the shot - the butterfly. But when we are out in the field, there are things that we cannot control, like where the butterfly lands. We may end up with photos having distracting elements like a twig, a branch, leaves or glaring spots caused by the sun.
Photography purists will argue that photographs should never be altered in any way and that they should retain their authenticity. However, some photographers would prefer to have these elements to be removed to make the photo look more pleasant. Good post-processing can bring out the character of the photograph, making a good photo a better one. There is no “right” or “wrong” in photography, everyone has different preferences, we just have to do it in an “ethical” way.

Photography purists will argue that photographs should never be altered in any way and that they should retain their authenticity. However, some photographers would prefer to have these elements to be removed to make the photo look more pleasant. Good post-processing can bring out the character of the photograph, making a good photo a better one. There is no “right” or “wrong” in photography, everyone has different preferences, we just have to do it in an “ethical” way.
Below are 3 examples of what can be achieved in Photoshop, from minor manipulation like removing some small distracting elements to a more major make-over.
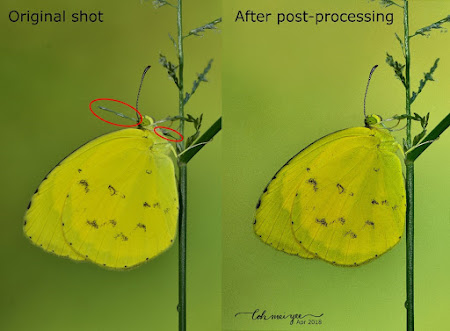
#1 : Example of a minor touch-up with only the flower of the grass being removed.
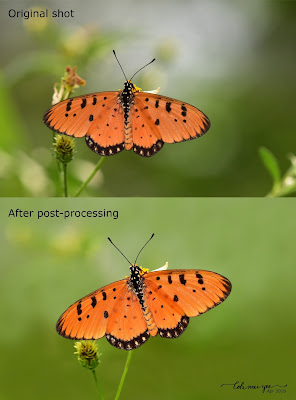
#2 : A little more work was done here with unwanted elements removed, distracting hotspots/highlights and background smoothened out.
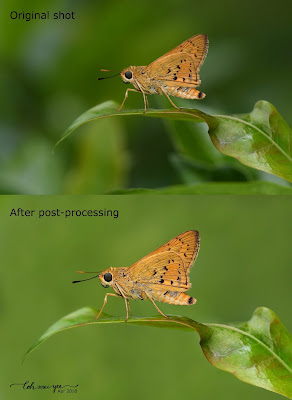
#3 : A major clean-up on the background to remove contrasty patches, distracting elements and hotspots.
Firstly, let’s talk about the Clone Stamp Tool. The Clone Stamp Tool allows you to duplicate or clone images. The process involves setting a sampling point in the image which will be used as a reference to create a new cloned area.
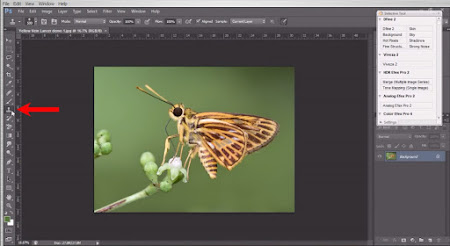
Open your file in Photoshop. From the Toolbar, choose the Clone Stamp Tool.
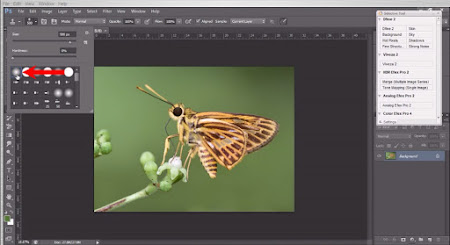
Under the “brush preset picker”, you can choose either soft feathery edged brush or hard edged brush. Frist, let’s try the soft feathery edged brush.
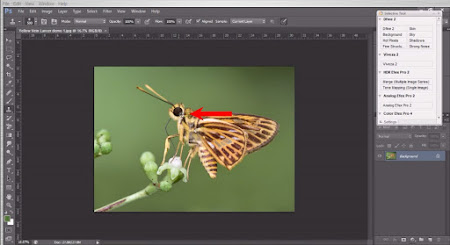
Set a sampling point by holding Alt key (for PC) or Opt key (for mac).
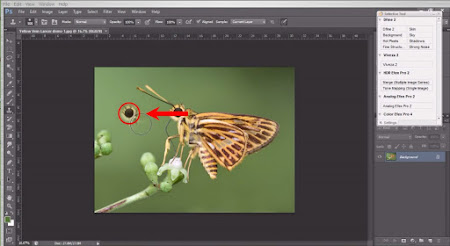
Click on the area you want to clone (without holding any key on the keyboard). The cloned image has a soft feathery edged.
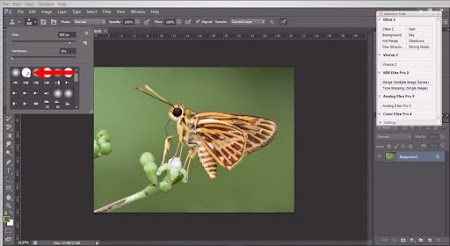
Next, let’s try the hard edged brush.
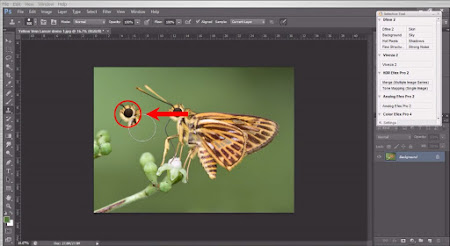
You can see that the cloned image has a hard edge.
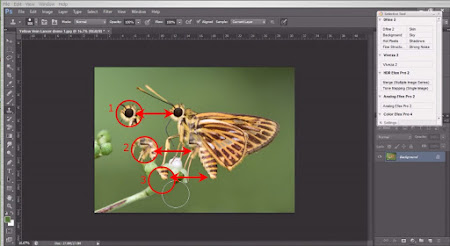
The distant between the sampling areas and the new cloned areas remains the same if they are cloned without setting new sampling point.
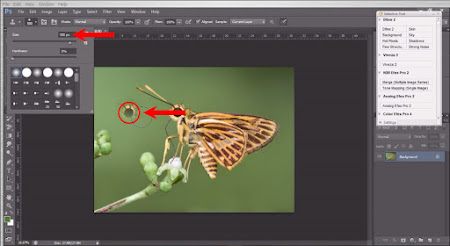
Only pixels within the brush will be picked up for cloning. A small brush size picks up a smaller area for cloning.
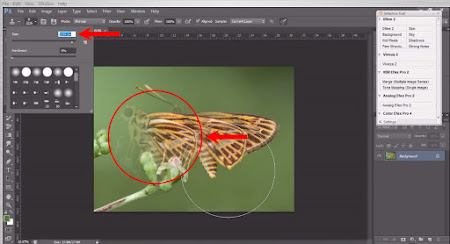
A large brush picks up a larger area for cloning.
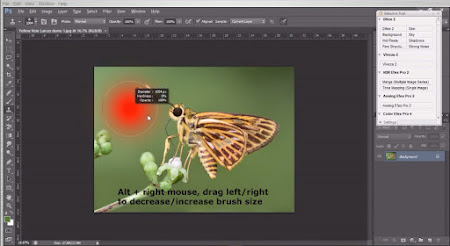
Another convenient way to change the brush size is to hold ‘Alt + right-click’ (for PC) or ‘Opt + Ctrl + click’ (for mac) on your mouse and drag to the right to increase the brush size and drag to the left to decrease the brush size.
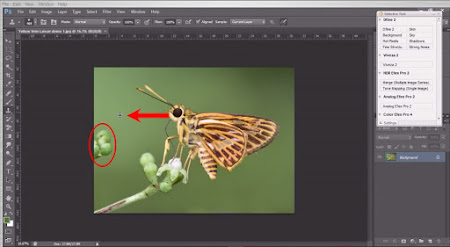
Removing the flower buds on the left. Set a sampling point on the green background and clone stamp on the flower buds.
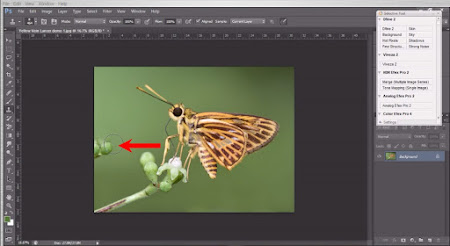
Continue setting new sampling points as needed and continue cloning.
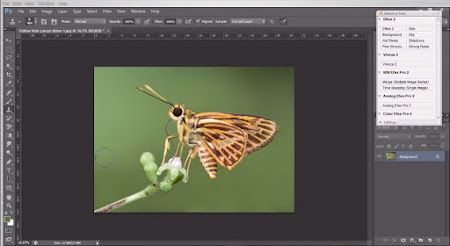
Continue cloning until the flower buds disappear.
I have also summarised the digital processing technique of using the Clone Stamp Tool in Photoshop for removing minor unwanted elements and cleaning the background of your shots in a simple video below.
Watch in HD for better quality.
We have come to the end of Part 3 tutorial. In the next and final article, I will be showing how to use Layer Mask in Photoshop for photo retouching. See you in the next article!
Text and Photos by Loh Mei Yee
Previous articles in this series :
Digital Post-Processing - Part 1 : Basic Post Processing
Digital Post-Processing - Part 2 : Noise Reduction